|
|
|
J.A. Fay and Egan Model 316 12 Inch Jointer Restoration.
Origins
· Purchasing
· Relocation
· Repair ·
Restoration
Origins.
Click here
for .pdf version of J.A. Fay & Egan, Co. catalog entry.
In 1869 the Illinois General Assembly appropriated funds for the location and establishment of the Northern Illinois Hospital
and Asylum for the Insane. Nine commissioners were appointed by the Governor to choose a suitable site on which to
locate the institution. After selection of a site in Elgin a board of three trustees, appointed by the Governor, was
empowered to supervise planning and construction, choose a superintendent, and operate the institution, subject to
inspection by the Board of State Commissioners of Public Charities.
The hospital opened on April 3, 1872 and received some of its first patients from the hospital for the insane at
Jacksonville. In 1906 the hospital opened a training school for nurses. The board of trustees and the Board of
State Commissioners of Public Charities were abolished in 1909 when all state charitable institutions came under the
control of the newly created Board of Administration. As part of this
reorganization the institution became the Elgin State Hospital.
From 1917 to 1961 the Department of Public Welfare administered Elgin State Hospital. In 1956, while under the
Department of Public Welfare, Elgin State Hospital began to participate in a departmental affiliation program in
psychiatric nursing. The Psychiatric Nursing Affiliation Program provided instruction in psychiatric nursing to students
from general hospital nursing schools.
The hospital remained part of the Department of Public Welfare until the creation of the Department of Mental Health in 1961.
Elgin State Hospital became Elgin Mental Health Center in 1975.
On February 16, 2005 I talked to the Chief Engineer at Elgin Mental Health Center. He had limited information about the
jointer, but told me it was sent to the CMS state surplus auction
because of a recent land sale of a 90 acre portion of the Health Center property. The Filippos of Chicago purchased
the property and acquired many of the antiques left on the property. According to the Chief, there was limited time to
remove everything from the property and some items were left behind.
The jointer had been used to clean up raw wood for everything produced in the woodworking shop.
This includes all of the moldings made for the mental health center. The jointer came with a large wood box of molding
knives that the chief said were always with the jointer. No one knows for sure if they were used on the jointer, but
he had the feeling they were. The last place the jointer had been was in the mason's shed setting on its side on a
dirt floor. He was not sure how the jointer was cracked, but thinks it may have happened in the move to
the auction in Springfield.
Purchasing.
The Illinois Central Management Services occasionally conducts auctions of surplus equipment from the various state agencies.
Most of the time the equipment is outdated computers and peripherals, cooking items and various printing presses,
chainsaws, you name it, they will eventually be selling it. At the surplus auction on Wednesday, January 19, 2005 a number of
items from Elgin Mental Health Center were included. A shaper, mortiser, several Delta wood lathes and a Fay and Egan model
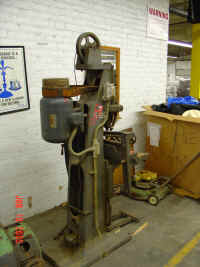
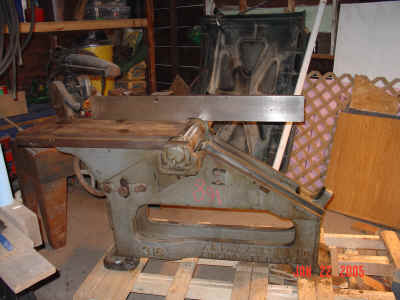
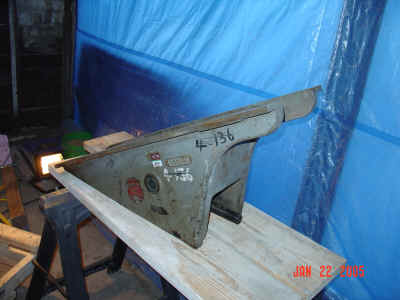
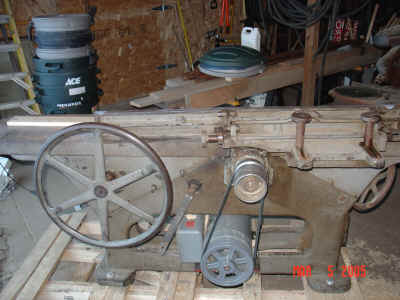
316 12 inch jointer. On the Tuesday preceding the auction I went to preview the equipment. When I first saw the jointer, I
was not sure what it was. A jointer of this size upside down looks like a very awkward machine. When I tilted my head and
read "J. A. Fay and Egan", I could barely speak. I ran over to the machine and determined that it was in fact a jointer.
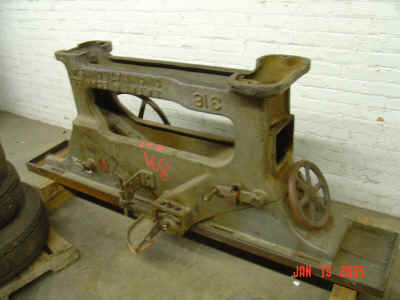
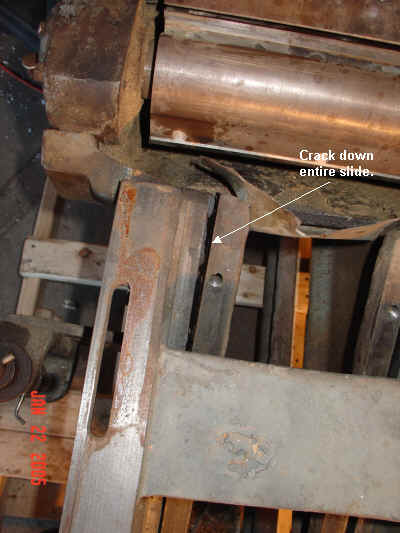
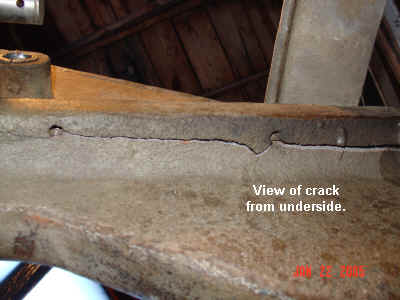
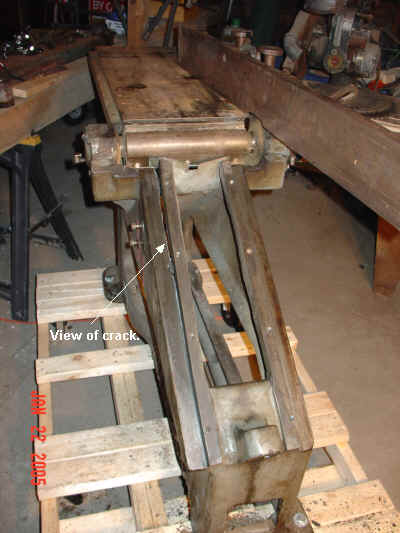
Upon first inspection of the beast, I noticed the the
rabbeting arm had been broken off, and that there was a
substantial crack on the in-feed sled casting as viewed from
the underside.
That evening I researched the jointer and determined that I needed this machine (necessity always being my first
justification) and that I could bring it back to life (I know 'righty-tighty lefty-loosy' has to do with screws and bolts),
and, I could afford it (credit cards are not all maxed out yet). So, with the justification that a new 12 inch jointer of
such quality could go for many thousands of dollars and that I really needed one, I was willing to spend quite a bit for this
hunk of broken cast iron.
On Wednesday, January 19, 2005, I took some time off work and went to the auction. Of course if you are waiting for one
individual item, it will be one the the last to go and so was the case for this
jointer. During the wait, I met several old timers interested in the jointer and talked with a few about the possibility of
the large crack causing permanent damage to the in-feed table angle and so on. Anyway, I made a few new friends in the hours
of wait time and have since been to their workshops to see their old iron (more about that later). When it came time for
the woodworking machines, the order was everything else, then the jointer. Of course not knowing how much I would have to
spend on the jointer, I let the Yates shaper and DeWalt mortiser slip by me for less than $100 each. Aarg!
Then came time for the jointer, the auctioneer started the bidding at a $1000 dollars... of course he did. When it
finally was reasonably bid at $50, I started in. After a $100 there were only two of us bidding. At $200 I had the feeling
the old timer was purposely running the price up... I may still have had the previous day's giddy look on my face.
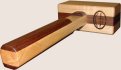
Finally, for $250 I had won the item. Along with the jointer came a hundred pound box of
jointer knives that supposedly go with the jointer. They look like shaper knives for a large
square cutter head. Also, a Westinghouse 3 phase 7.5 h.p. motor with 4 inch leather belt
and shiny new set of blades for the jointer. Thanks again to Visa for making this all possible.
Relocation.
This was my first attempt at moving anything of this
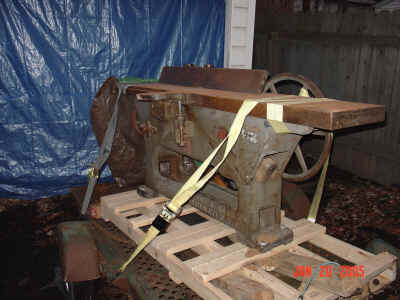
girth. According to the catalog entry for this model, the domestic shipping weight is 1750 lbs. That Wednesday night, I
built a special skid for the jointer, one that would allow for a forklift and could be used to travel on casters back in the
shop. With several 2 x 4's, some glue and screws, I had a very hefty skid. During my lunch the following day, I went to the
warehouse and lag bolted the jointer to the skid. Two fork lift operators then came over and help turn it right-side-up. This
process scared the poop out of few other fellows and me, but was ultimately successful. The only casualty was the slightly
bent handle for the spring-joint adjustment.
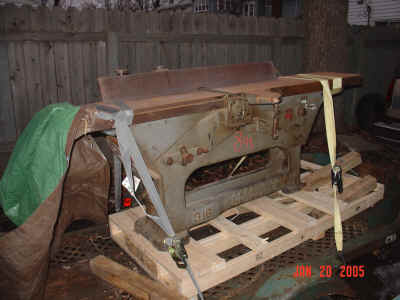
One of the fork lift operators then loaded this on a borrowed single axle tilt trailer rated for 2000 lbs. I wish there had
been video footage of this event. When the full weight of the machine was applied to the trailer a shriek came from from
somewhere in its leaf spring suspension that made everyone move away quickly. I strapped the machine down, it seemed like
the right thing to do, knowing there was no stopping this it from tipping if it got to that point. It was amazing how once
turned right-side-up, the charisma of this jointer reduced grown men into giddy schoolboys. There was no lack of
volunteers to help in getting the jointer up and on the trailer and strapped down.
Driving it home was as eventful as it could have been. No one pulled out in front of me or even stopped short. I guess only
having to travel 11 blocks was a bonus in this case. Of course the two sets of train tracks on the way were a bit rough. When
crossing the second set, the crossing lights and bells activated, and the crossing arm came down shortly after I
cleared their reach. I don't know whether the crossing arm or the jointer would have won that battle, but somehow I'm sure
the jointer and I would have been long gone when the police investigation began. Once home I backed the trailer down
the driveway and parked it until later.

On Thursday after returning from work, I backed the trailer until it just entered the garage. I jacked up one end of the skid nearest
the rear of the trailer and installed two 5 inch free turning casters. Next I removed the jack and pulled the trailer tilt pin.
Thankfully we had done a good job centering the weight over the axle, I carefully lifted the front of the trailer until
the rear was firmly on the ground. I didn't know whether it would slide off on its own or not, but, it didn't. I grabbed a
long steel pipe I use for leverage on wrenches and cinched the jointer down the trailer and into the garage. Excellent...
Next I jacked up the other end of the skid and added four more casters. My day ended with a sigh and a cold beer.
Repair
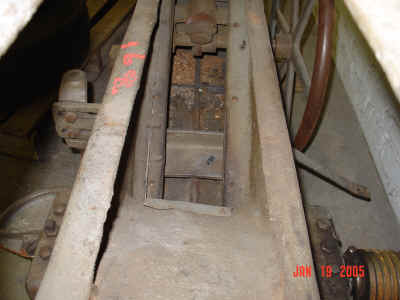
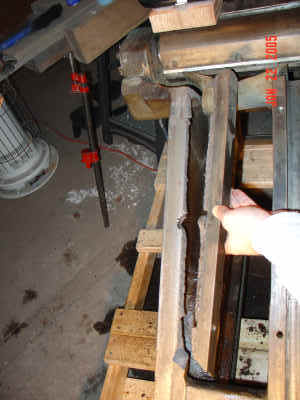
I knew that the first item to be addressed was the large crack in the infeed slide. I removed the infeed table
and got a better look down at the crack, not good.
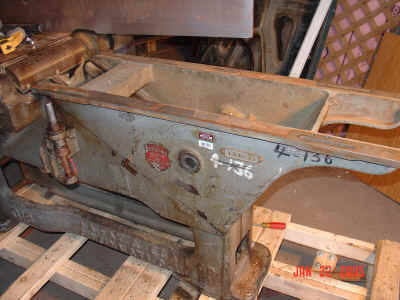
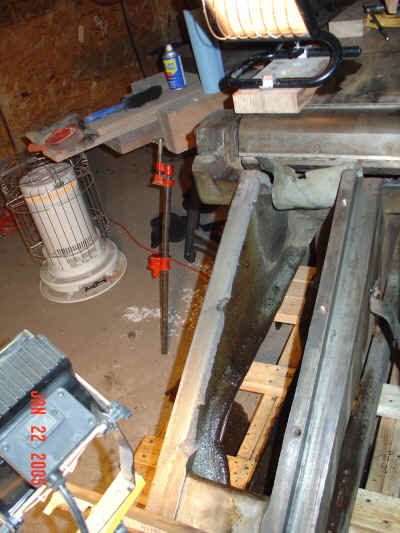
After removing the adjustment gears, I lifted off and moved the infeed sled, then picked up and reassembled my lower
intestinal track and abdominal muscles.
As it turned out, the crack was minor compared to another problem that became apparent. The large adjustment
screw was bent badly enough that it shifted the infeed sled back and forth as the table was adjusted up and down.

The crack was only in a guide that keeps the sled from moving laterally to the rear of the jointer. If this cracked piece
were repaired, the table would no longer adjust up and down because the lateral movement of the sled caused
by the bent screw would bind against this guide.
Now to get the screw fixed. Of course when presenting to a local machine shop, they seemed carefree when saying, "No
problem, we'll put it in the press and straighten it out.". I joyously went back to work and waited anxiously
for their call. Later that afternoon, I received a call from Napier and was notified that the screw broke.

I asked whether they heated it up before pressing it and they replied "no, we cold press everything...". It is hard for me
to believe that people that make their living working with metal and big machines would do this! Sorry, I am still angry about
this part. After work I went to the machine shop and tried to get some suggestions on how to fix it. They no longer wanted
to deal with me and wouldn't even say yes to whether it could be welded or not. After all their trouble, they didn't even
charge me. I think someone there screwed up and they wanted me as far away from that shop as they could get me, of course
they did mention that they could probably reproduce the part for around $600.00! I hope they are not in need of a
recommendation.
With a little yankee engineering, a piece of plate steel, some JB Weld and set screws I was able to reassemble the
screw. I first set up a jig on my disc sander and ground the two pieces to 90º. Then I cut a 1/2" thick piece of
plate steel to the dimensions of the diameter of the collar on the shaft part of the screw. I drilled and counter bored holes
for set screws and attached the plate steel to the collar. Next I screwed the screw into the machine, placed the gear shaft
into the sled and put the sled back on the machine. Once I got it lined up where it was supposed to ride, I jb welded the
screw to the plate steel. A couple days later I went out and carefully removed the screw with newly mated shaft from the jointer.
I removed the set screws and was able to drill two holes for set screws through the plate steel and into the
screw. After tapping these holes very, very, very carefully, I installed my set screws, added some jb weld to the shaft side of
the plate steel and reattached it with the set screws from earlier. A day or two later came the moment of truth. I put
the screw back on the jointer, set the sled back in place and installed the gears. I was nervous when I tested the up and down
adjustment and almost wept over the sweet ride.
Ok, one problem down, many to go. The crack was long and deep. I thought maybe someone could weld this thing back together, but
everyone said that if that slide got too hot, it could warp and would never mate perfectly again. So, I filled it full of JB
weld and tried to clamp it up. Did you guess that this wouldn't work? Well if you did, you were correct. Now I had a
lateral support that didn't keep the sled where it was supposed to. I tried chipping away at the weld, but broke the
entire piece off instead.
As it turns out, this was an accidental advancement for Chris-kind. I was able to grind
down the high spots and remove all the weld on the piece and the machine. Now I could get the piece almost perfectly mated
back together. The next problem was that there was no good way to clamp it. Well, with a couple newly tapped holes, I was
able to screw in a steel bar that gave a place for some direct and angular clamping pressure. So, I JB welded it back up,
clamped it in and let it set for a few days.
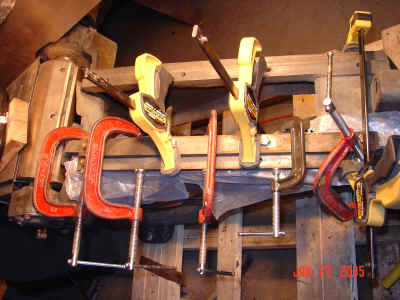
When I removed the clamps, I gave it a few good hard whacks with a dead blow
mallet and it didn't budge. I ground out the extraneous weld and reassembled the infeed sled and table. All
mechanicals in working order now.
Now for mechanized power. The large motor must have been mounted to the floor within a few
feet of the machine and was totally overkill for this machine.
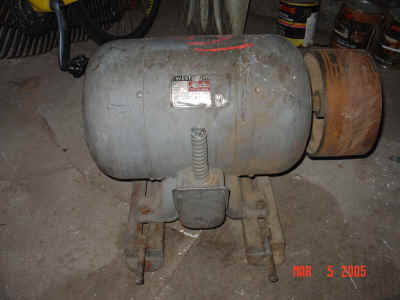
According to the catalog entry on this machine, the 12 inch model used a 3 h.p. motor and only the 30 inch model used the
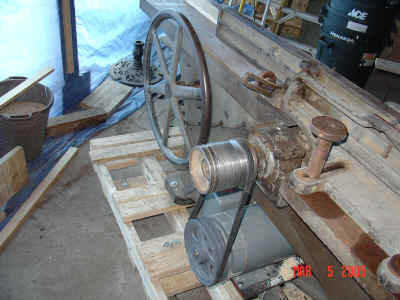
7.5 h.p. motor. I purchased a 5 h.p. single phase 230 v motor from one of the old timers that I had met at the auction. I
mounted the motor on 1/4 " plate steel and was able to just fit it under the machine. Now I had to find pulleys to
drive it. Well with help from the OWWM discussion group, I realized that legitimate sheaves and pulleys are way to
expensive. So, I went to a website called www.surpluscenter.com
and found a cast iron double grove pulley that was perfect size to give me reasonable blade speed. I had to take the
4" leather belt pulley off of the cutter head shaft and have two grooves cut into it to match the motor pulley. For
$80 double groove cutting, a $26 2-groove 9 inch motor pulley and a $25 v-belt, I had enough to test it.
I hooked up the pulleys, mounted the motor, added a belt and wired the system to my table saw switch. (don't
worry, I checked the jackscrews too.) I was in the other room with the table saw when I first started the jointer. Yee haw!
Hearing it fire up and sound like a big machine should was awesome.
With the extensive help of Alaskan Frontiersman and OWWM.com member Dan Hall, I
was able to get a Westinghouse motor starter and an Allan-Bradley pushbutton station
operational.
Next comes the restoration. I will try the electrolysis method on as many parts as I am able and see how it goes.
|